


A couple years ago, I was a developer for a startup which has almost no test coverage. Super enthusiastic me from the past spent a few weeks coding tests, and factories… all that based on the gem FactoryGirl. Two days before I’m satisfied of what I’ve done, they announce that FactoryGirl needs to be upgraded to FactoryBot.
A few days ago, I’m like hey I want to talk about DRF on Clever Cloud, I’ll make a little API, who cares which python I’m using, let’s use 2.7! So I’m coding the project, making a nice readme and the python team finally decides to explicitly invite users to migrate to python 3….
Anyway ! the project is here all you have to do is to git clone the repo or have your own DRF repo locally.
If you use your own repo, make sure to have the following lines in your settings.py
PRODUCTION = True
if PRODUCTION:
    DATABASES = {
        'default': {
            'ENGINE': 'django.db.backends.postgresql_psycopg2',
            'NAME': os.environ.get('POSTGRESQL_ADDON_DB'),
            'USER': os.environ.get('POSTGRESQL_ADDON_USER'),
            'PASSWORD': os.environ.get('POSTGRESQL_ADDON_PASSWORD'),
            'HOST': os.environ.get('POSTGRESQL_ADDON_HOST'),
            'PORT': os.environ.get('POSTGRESQL_ADDON_PORT'),
        }
    }
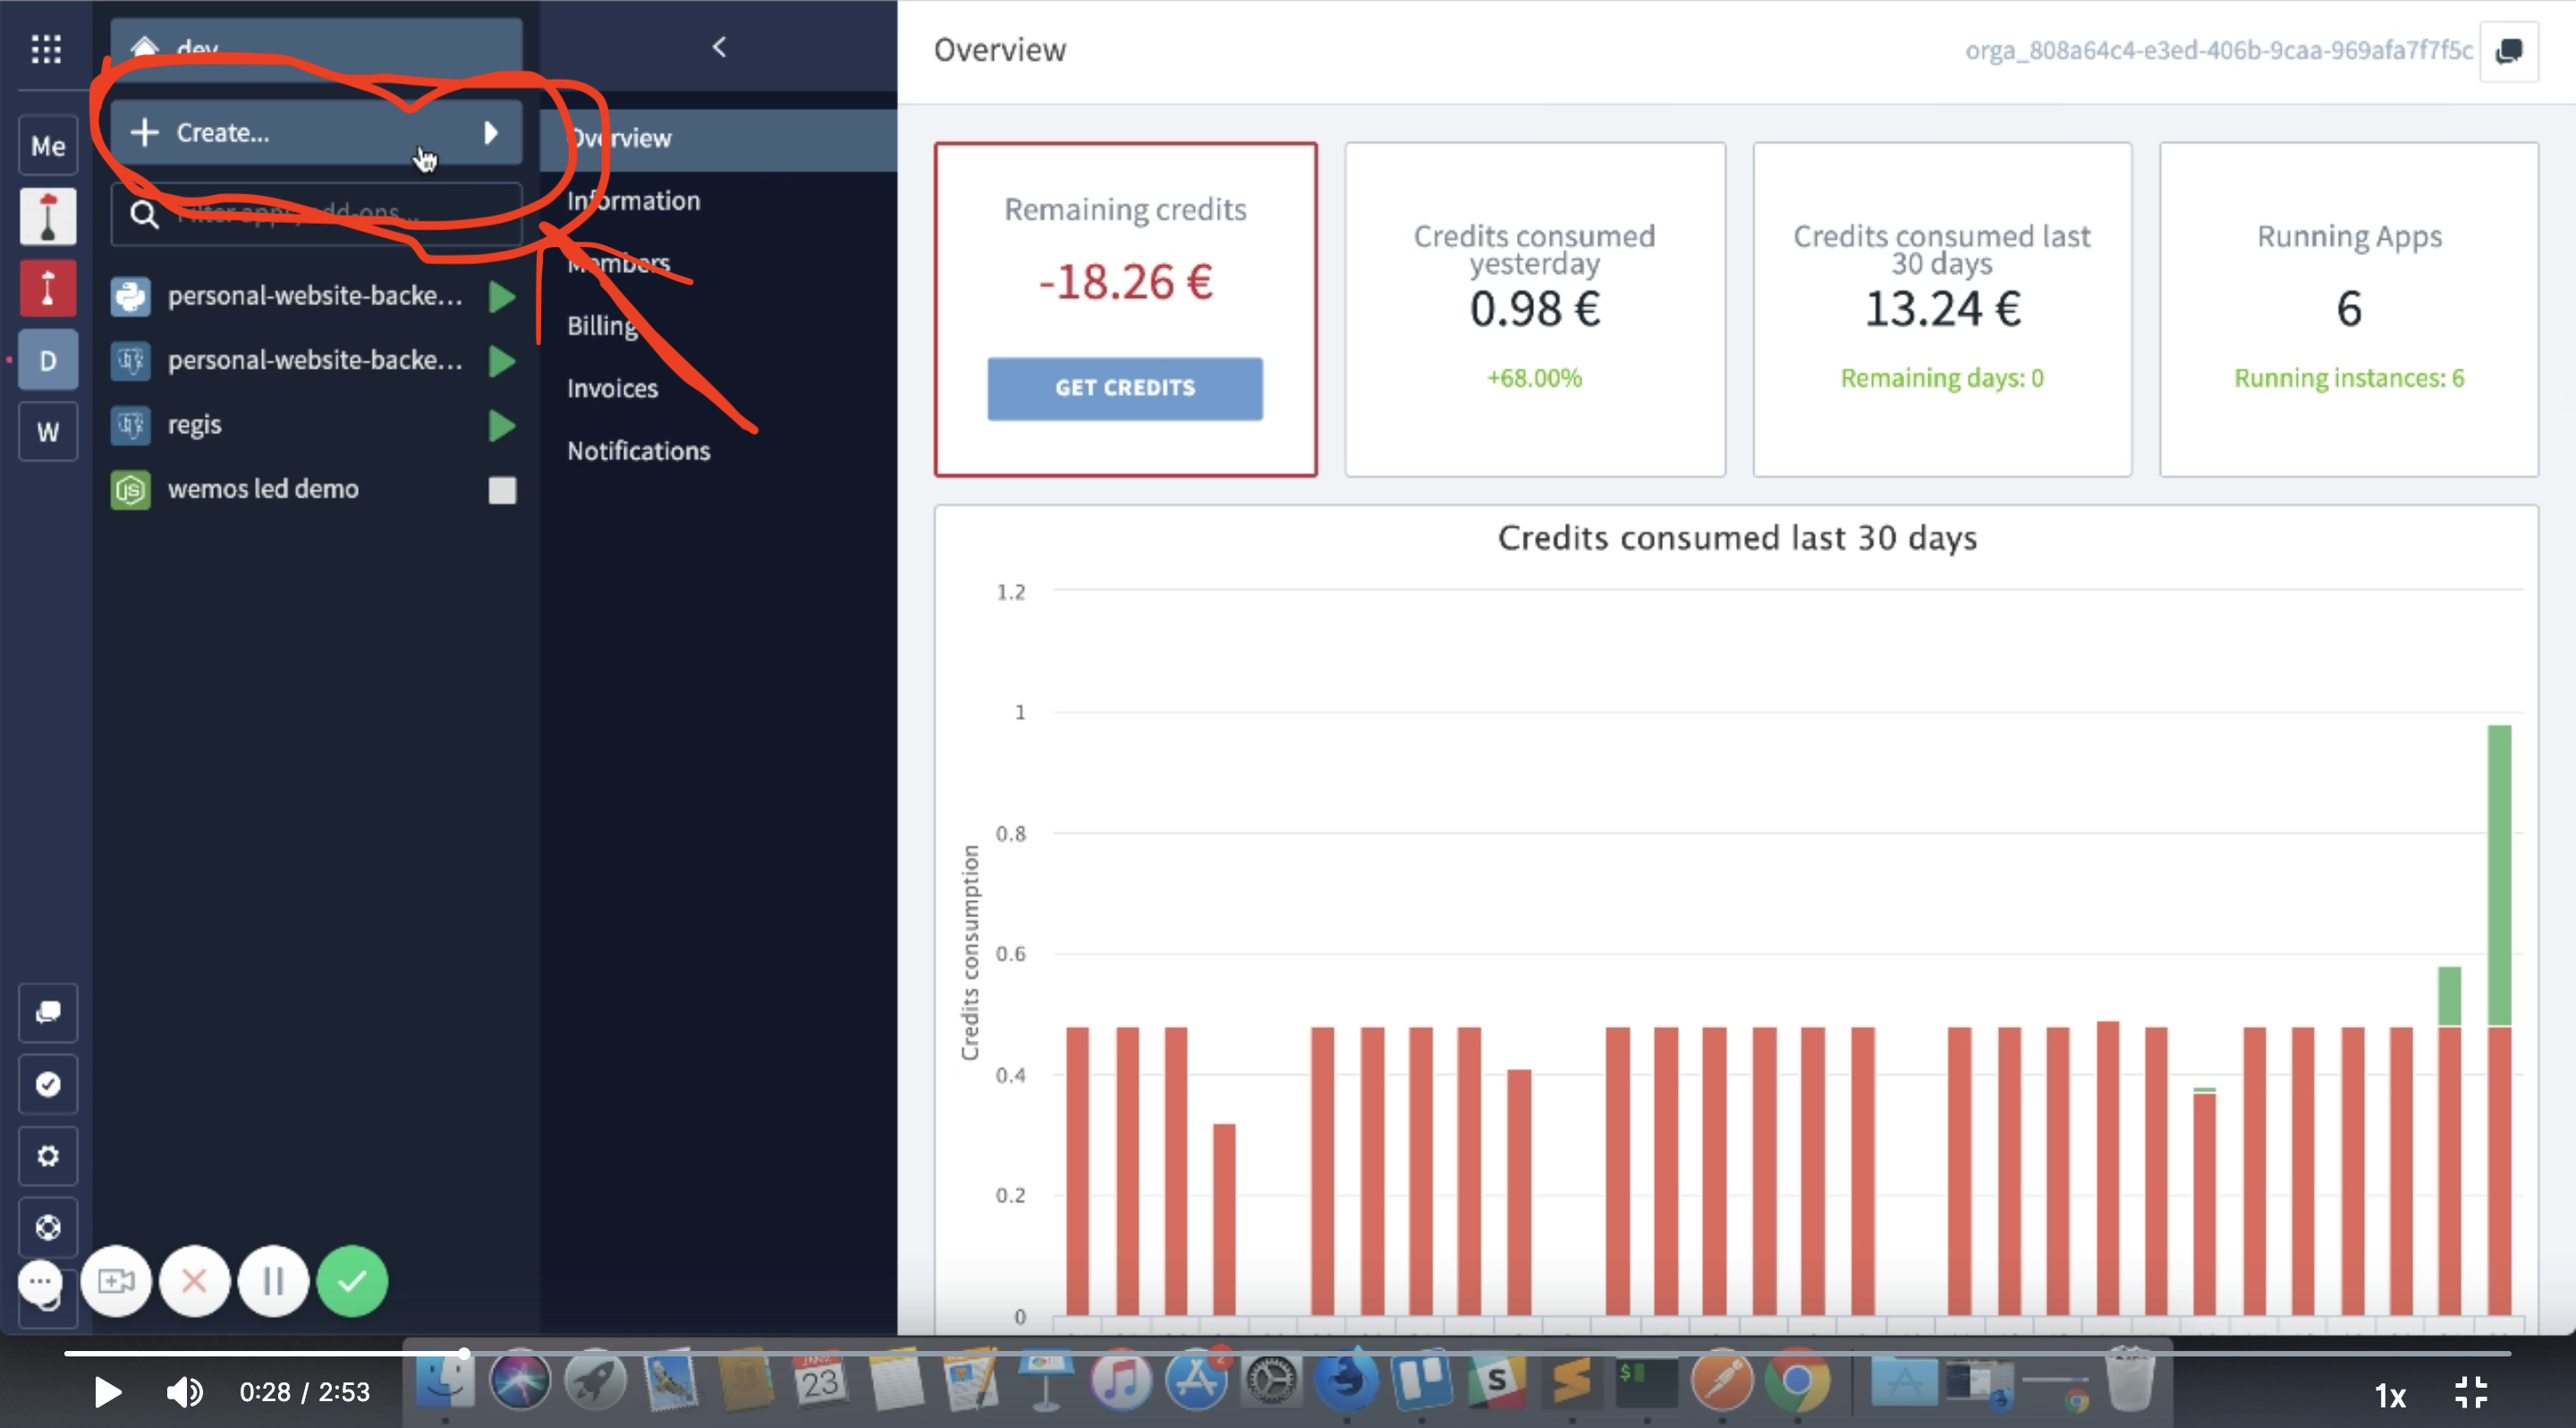
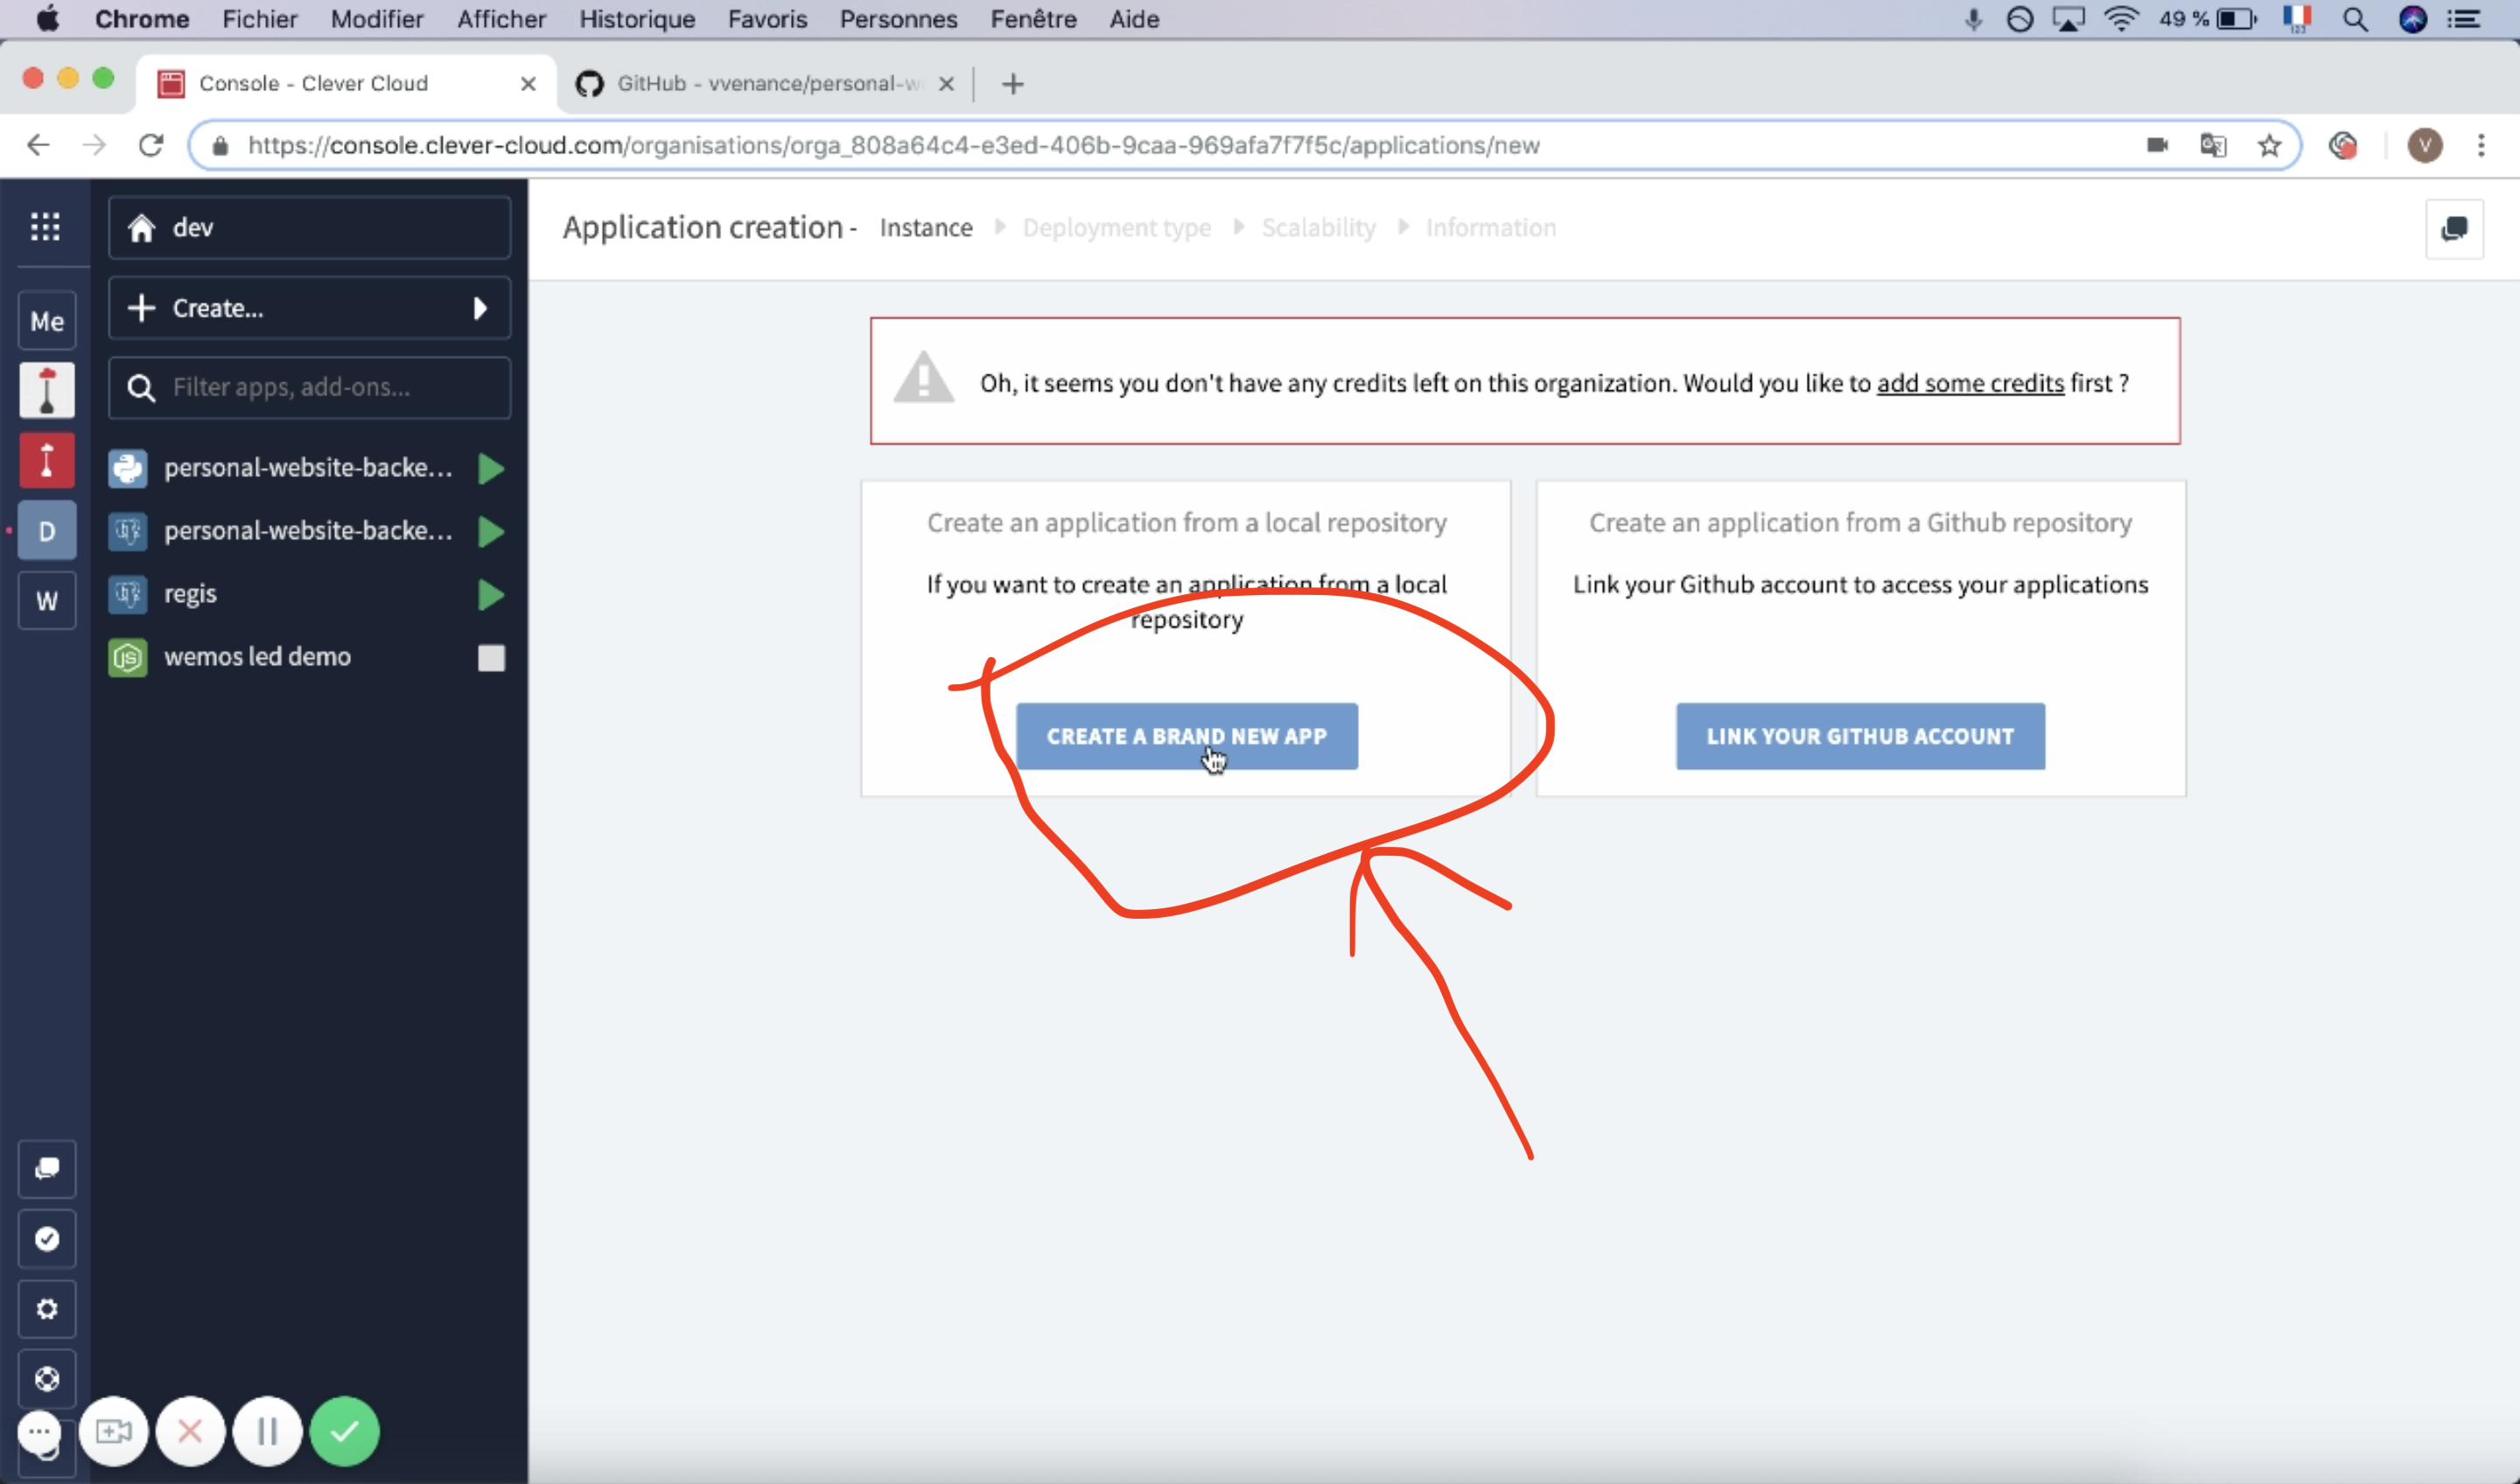
go to Clever Cloud console and select create a new application. Select brand new app.
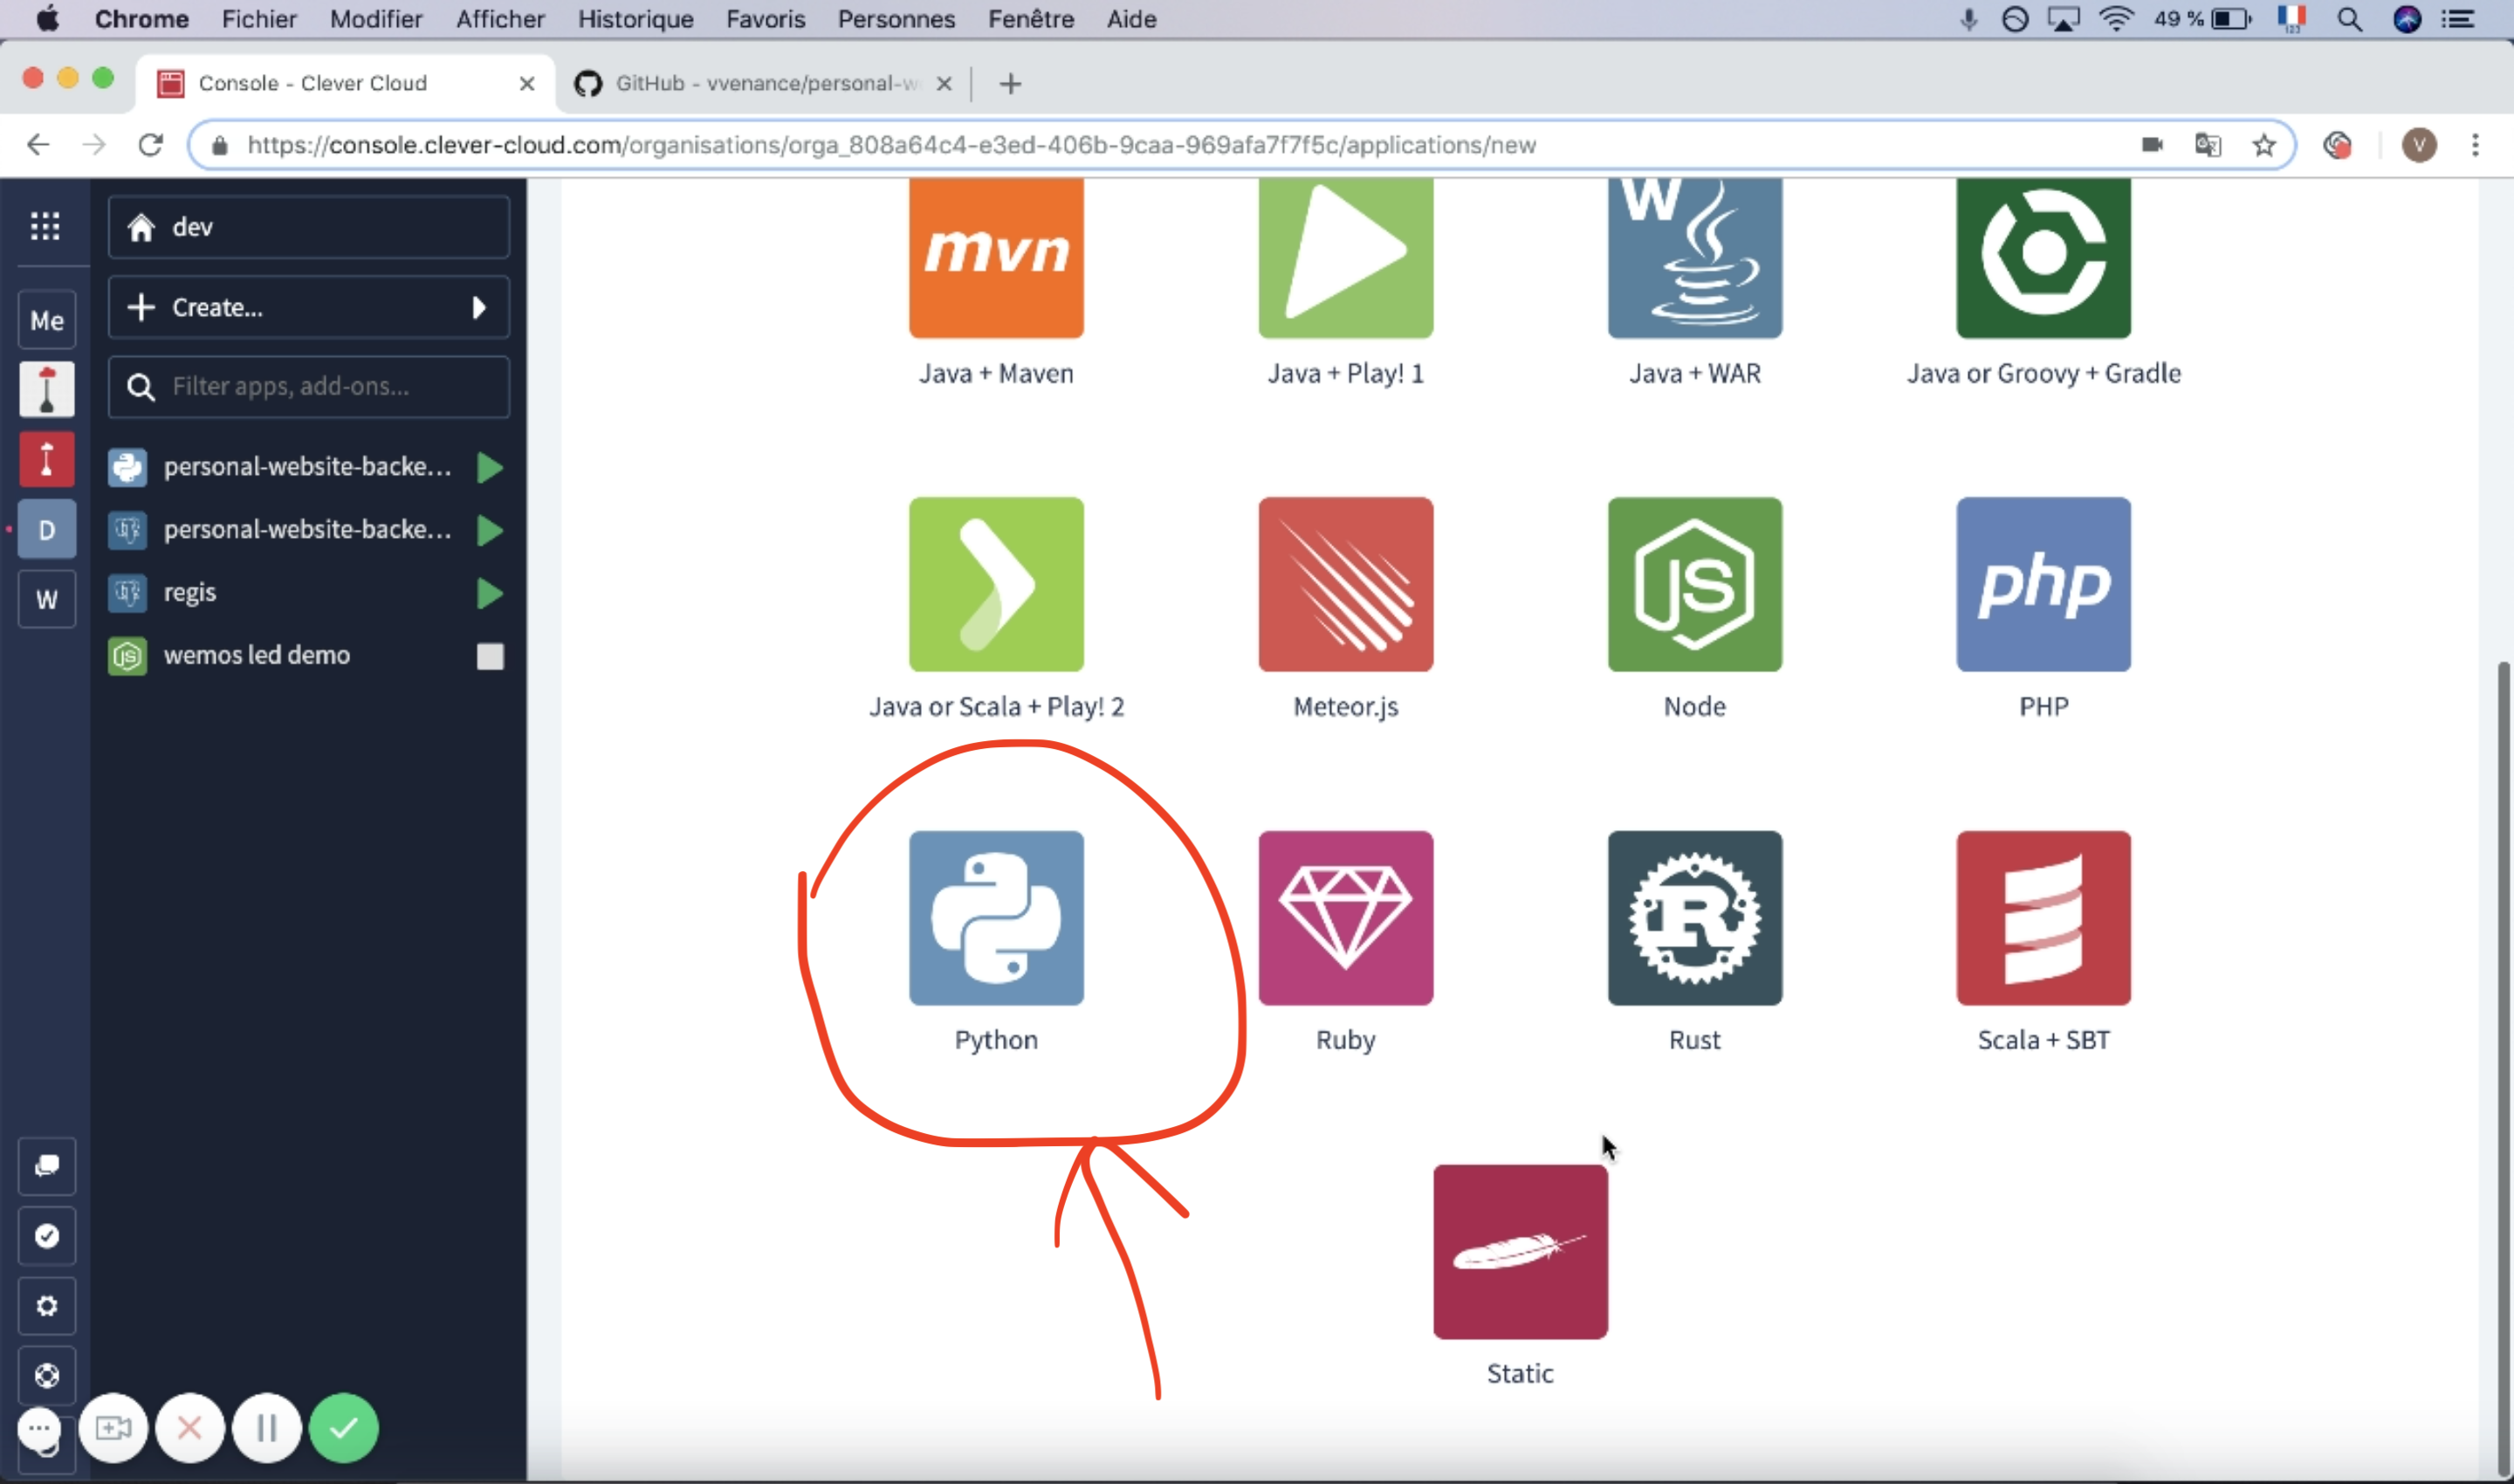
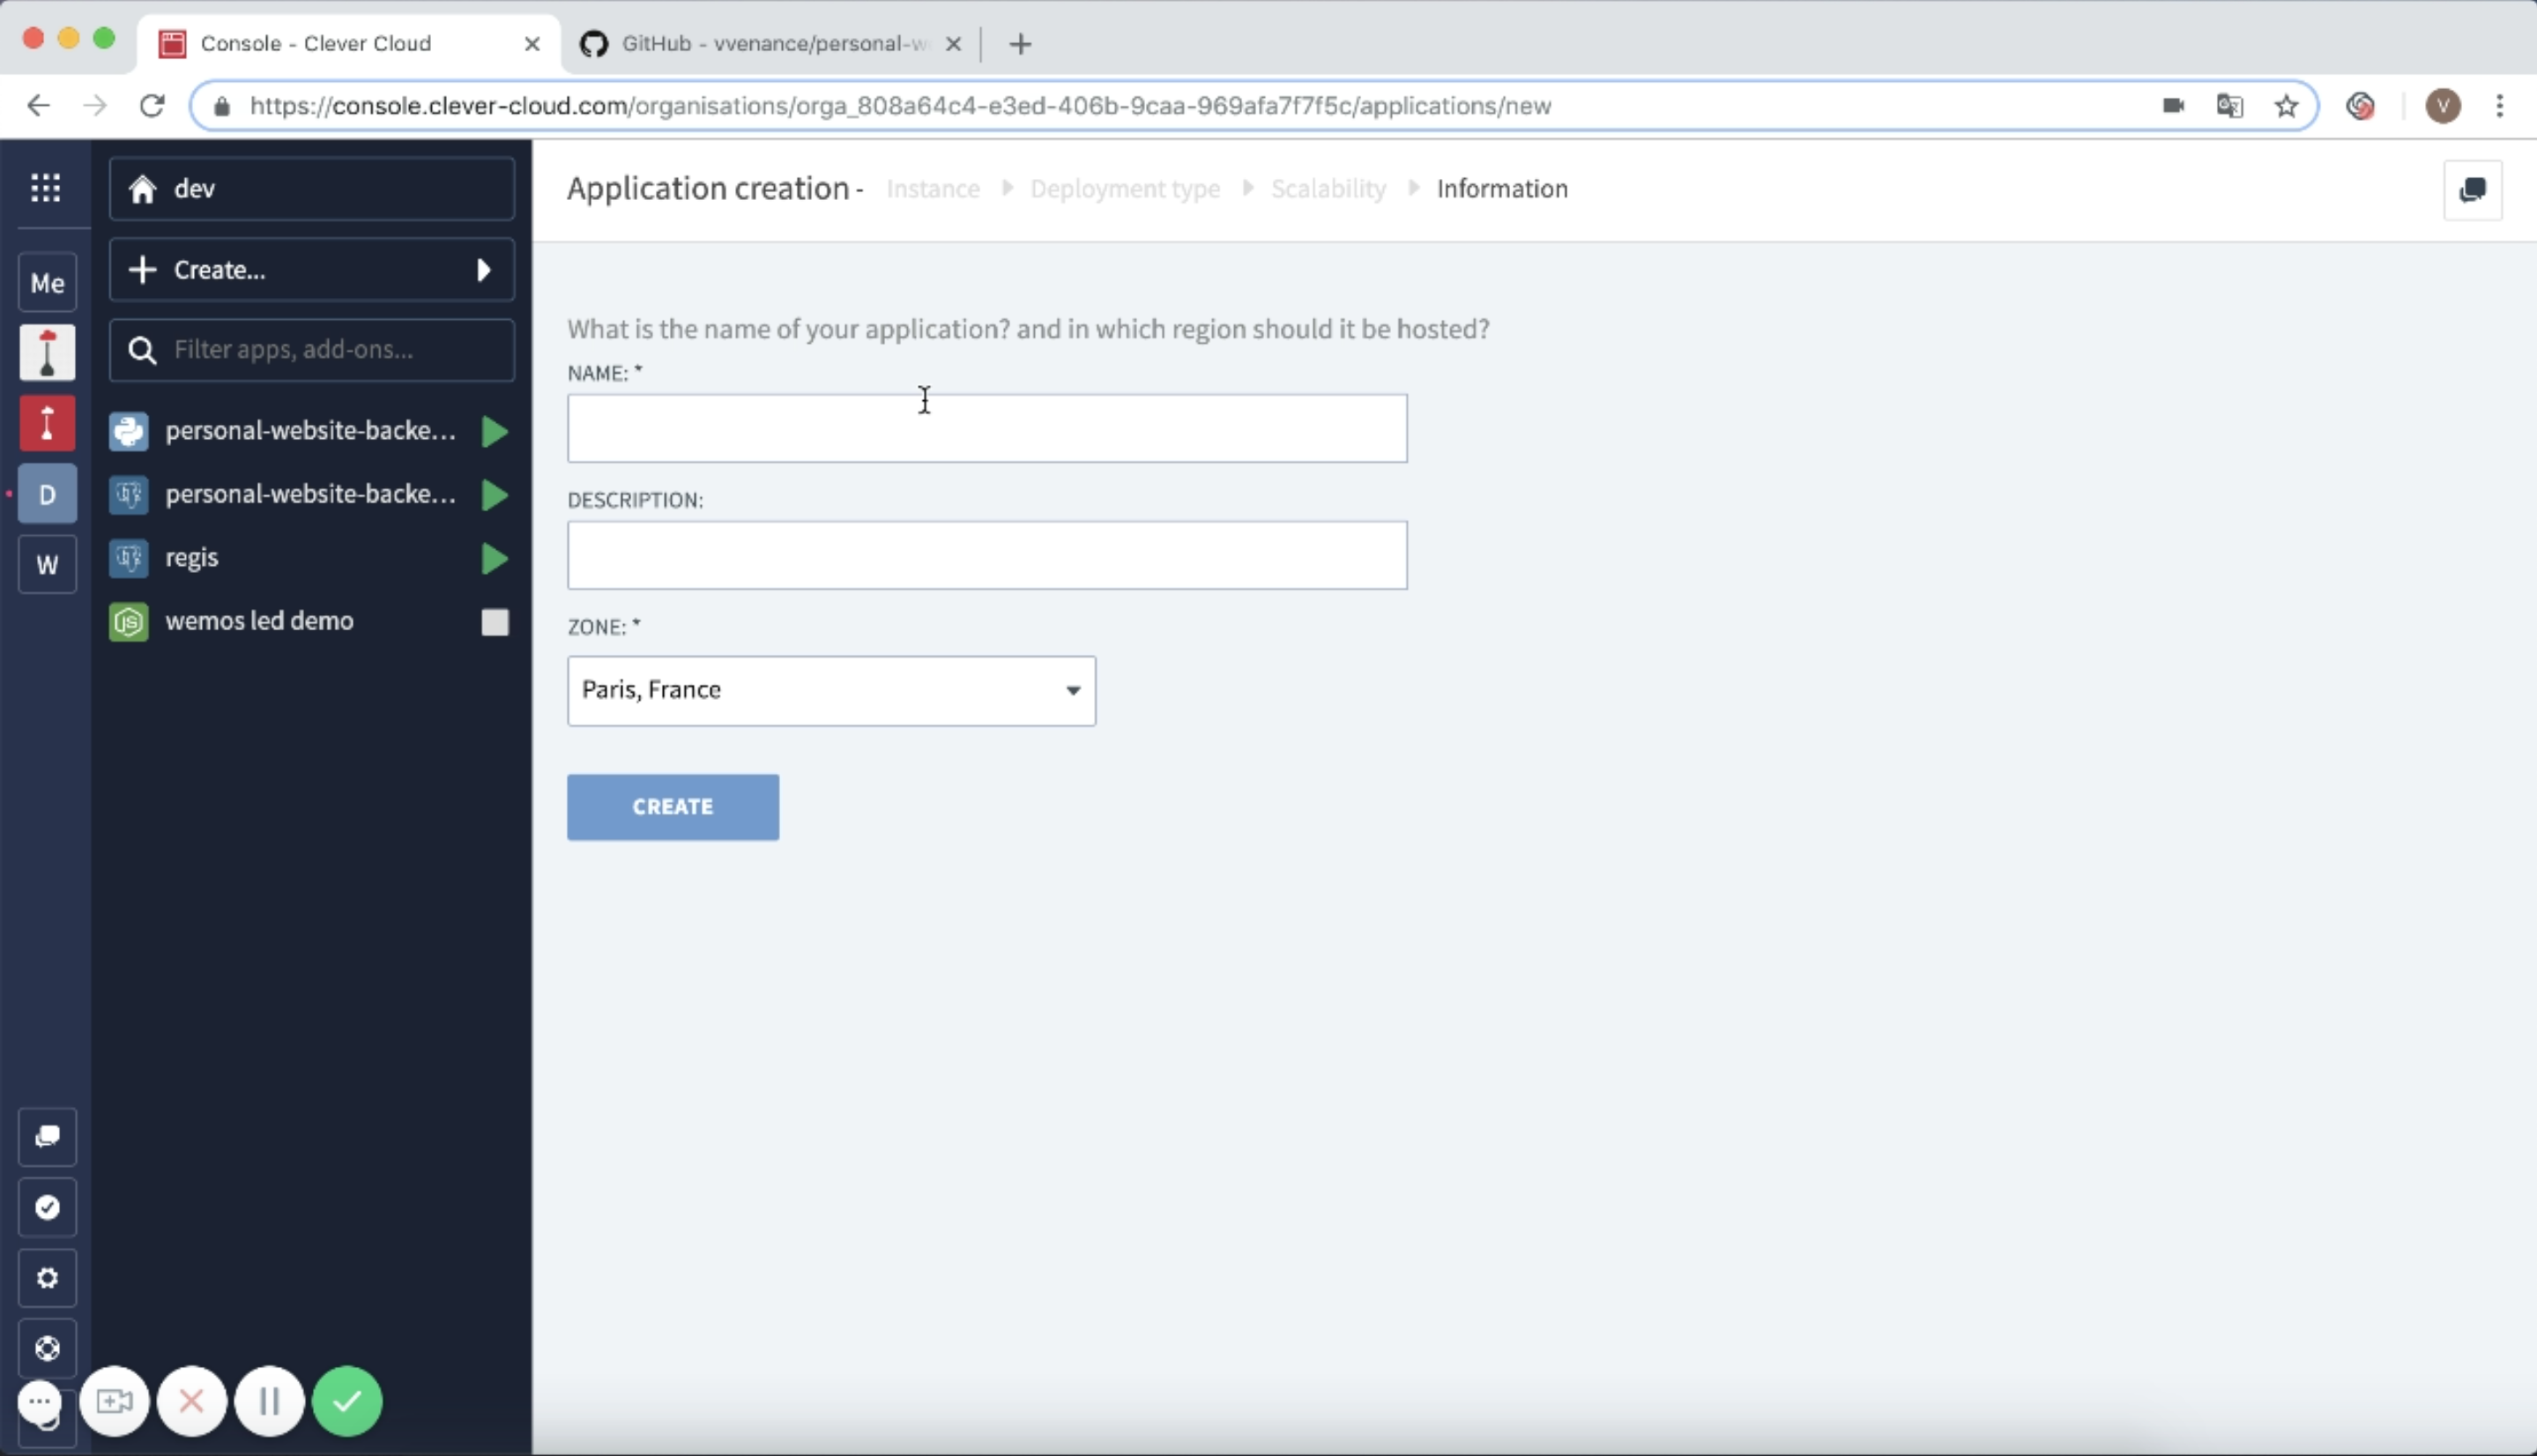
Click next and select python, then name you application.
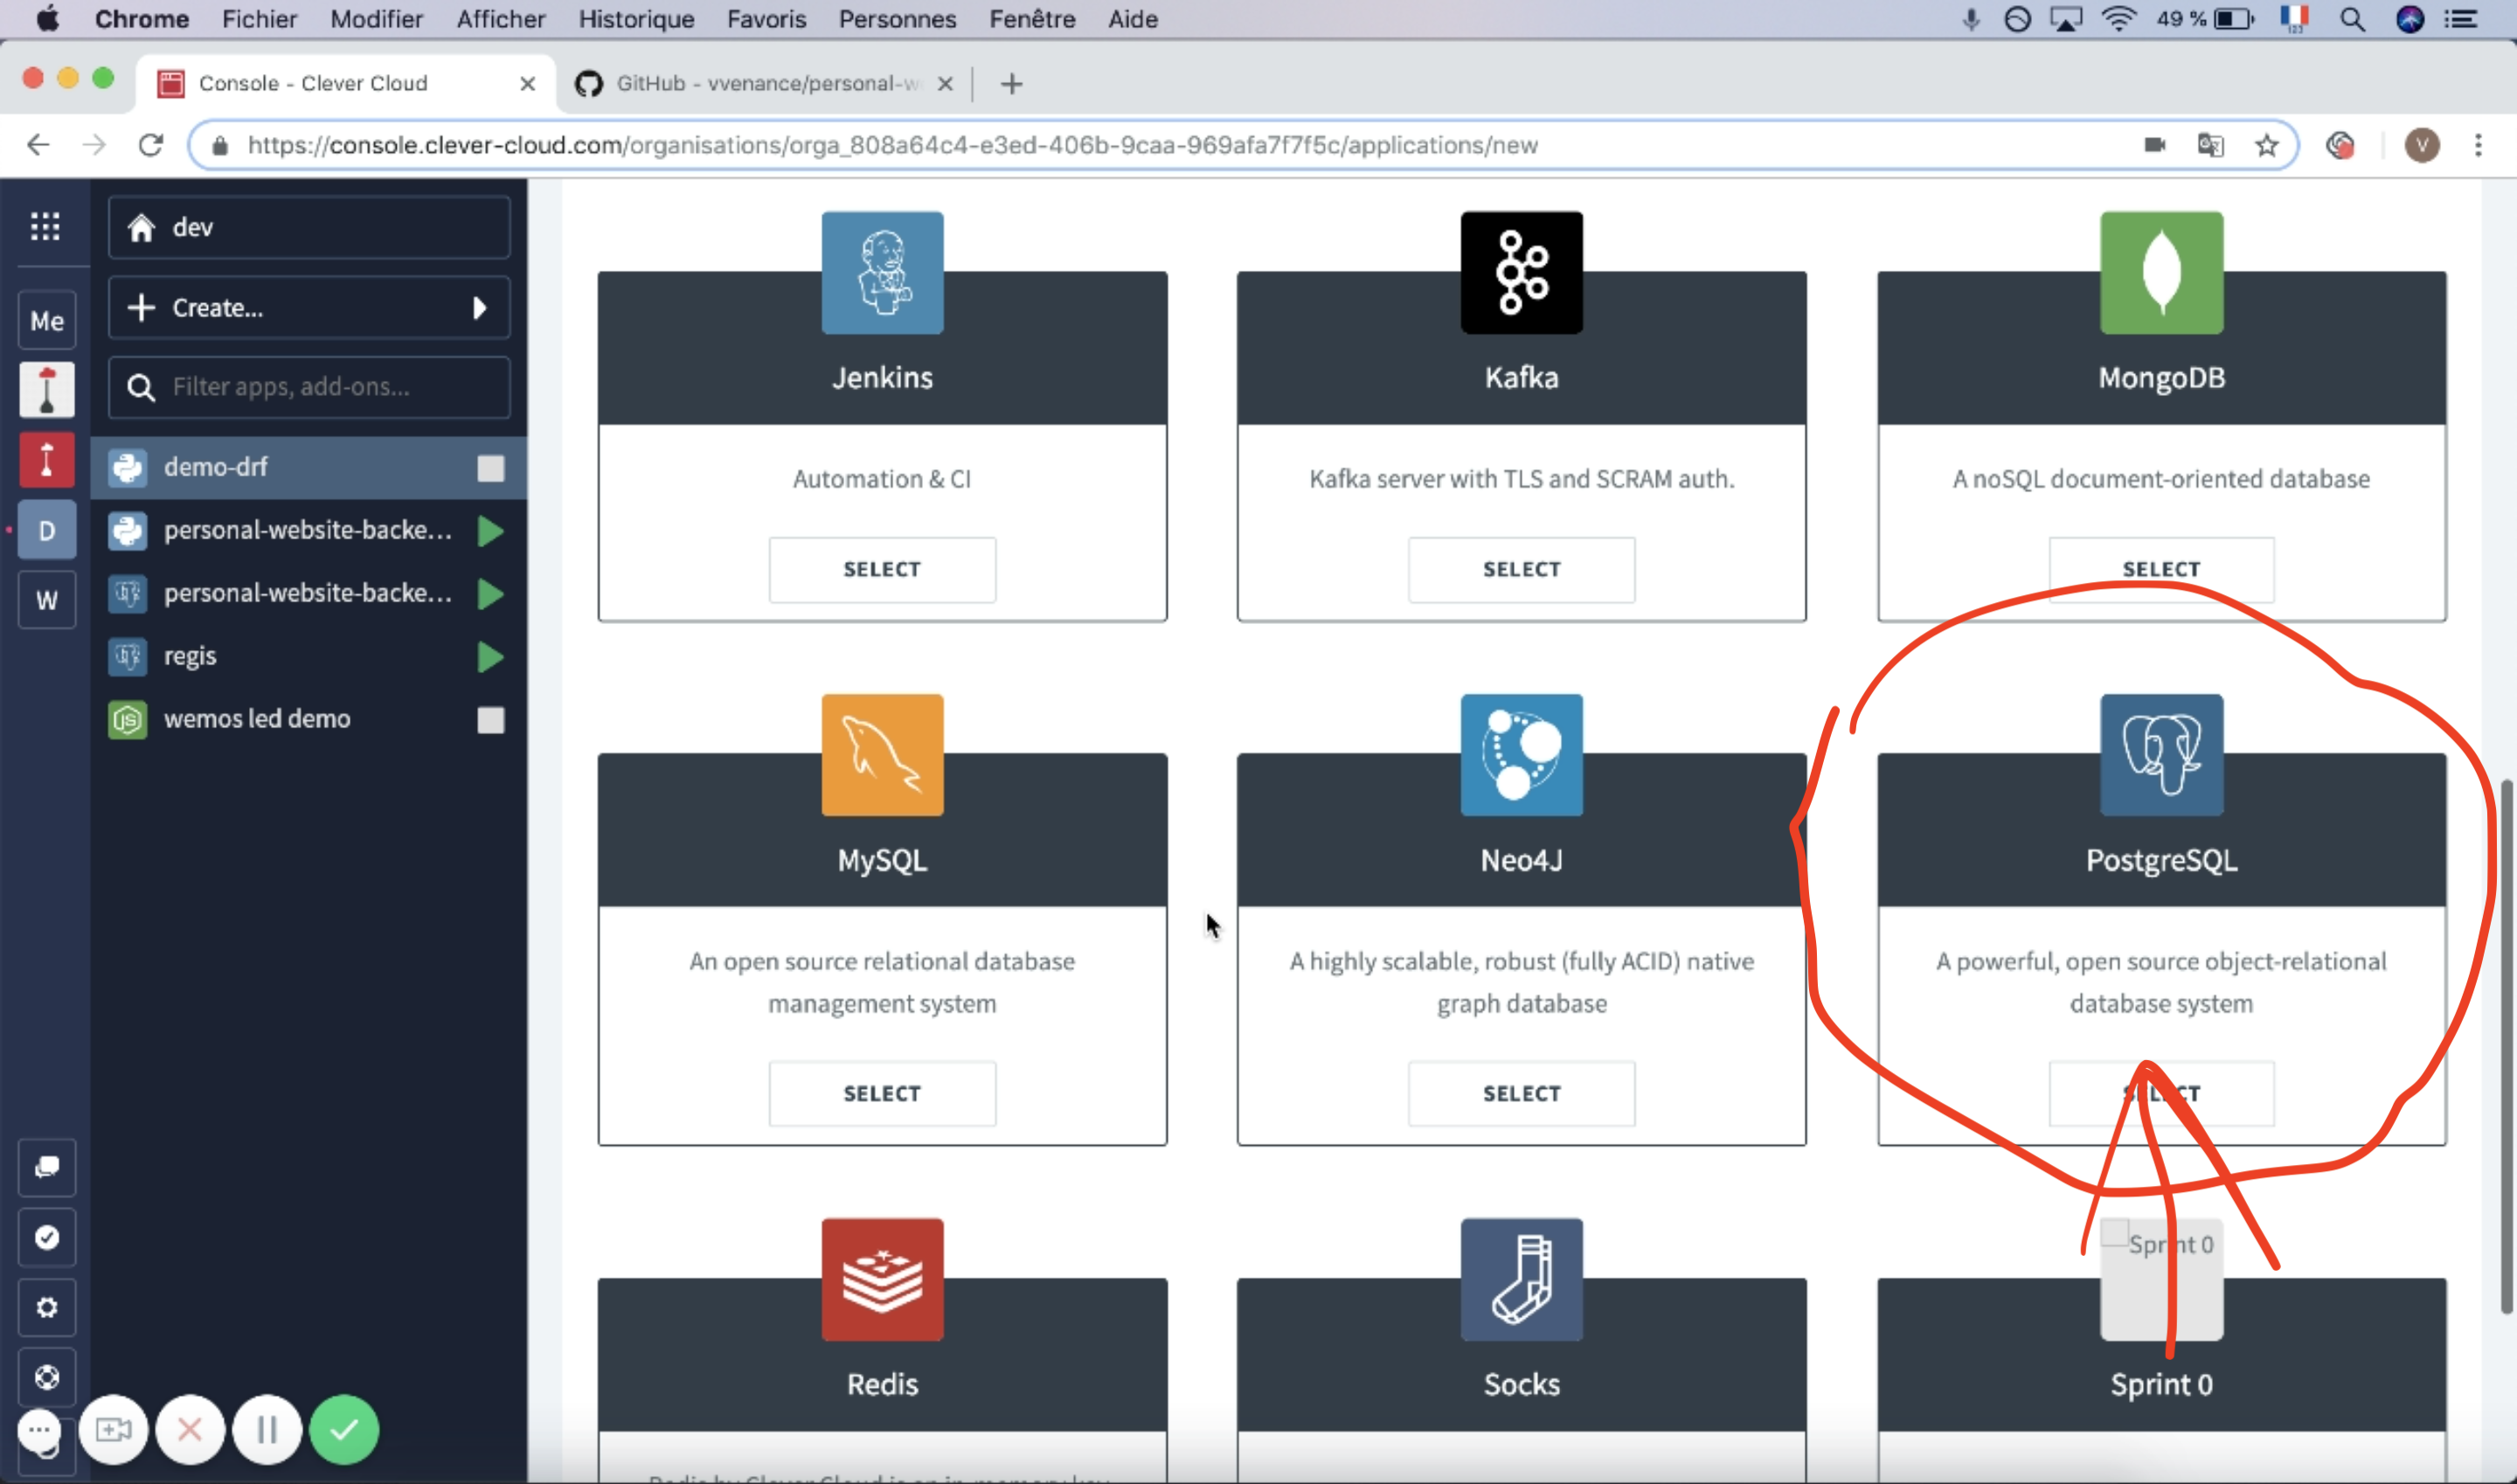
The Clever Cloud console will ask you if you want to link an add on. Select postgreSQL and name your add-on
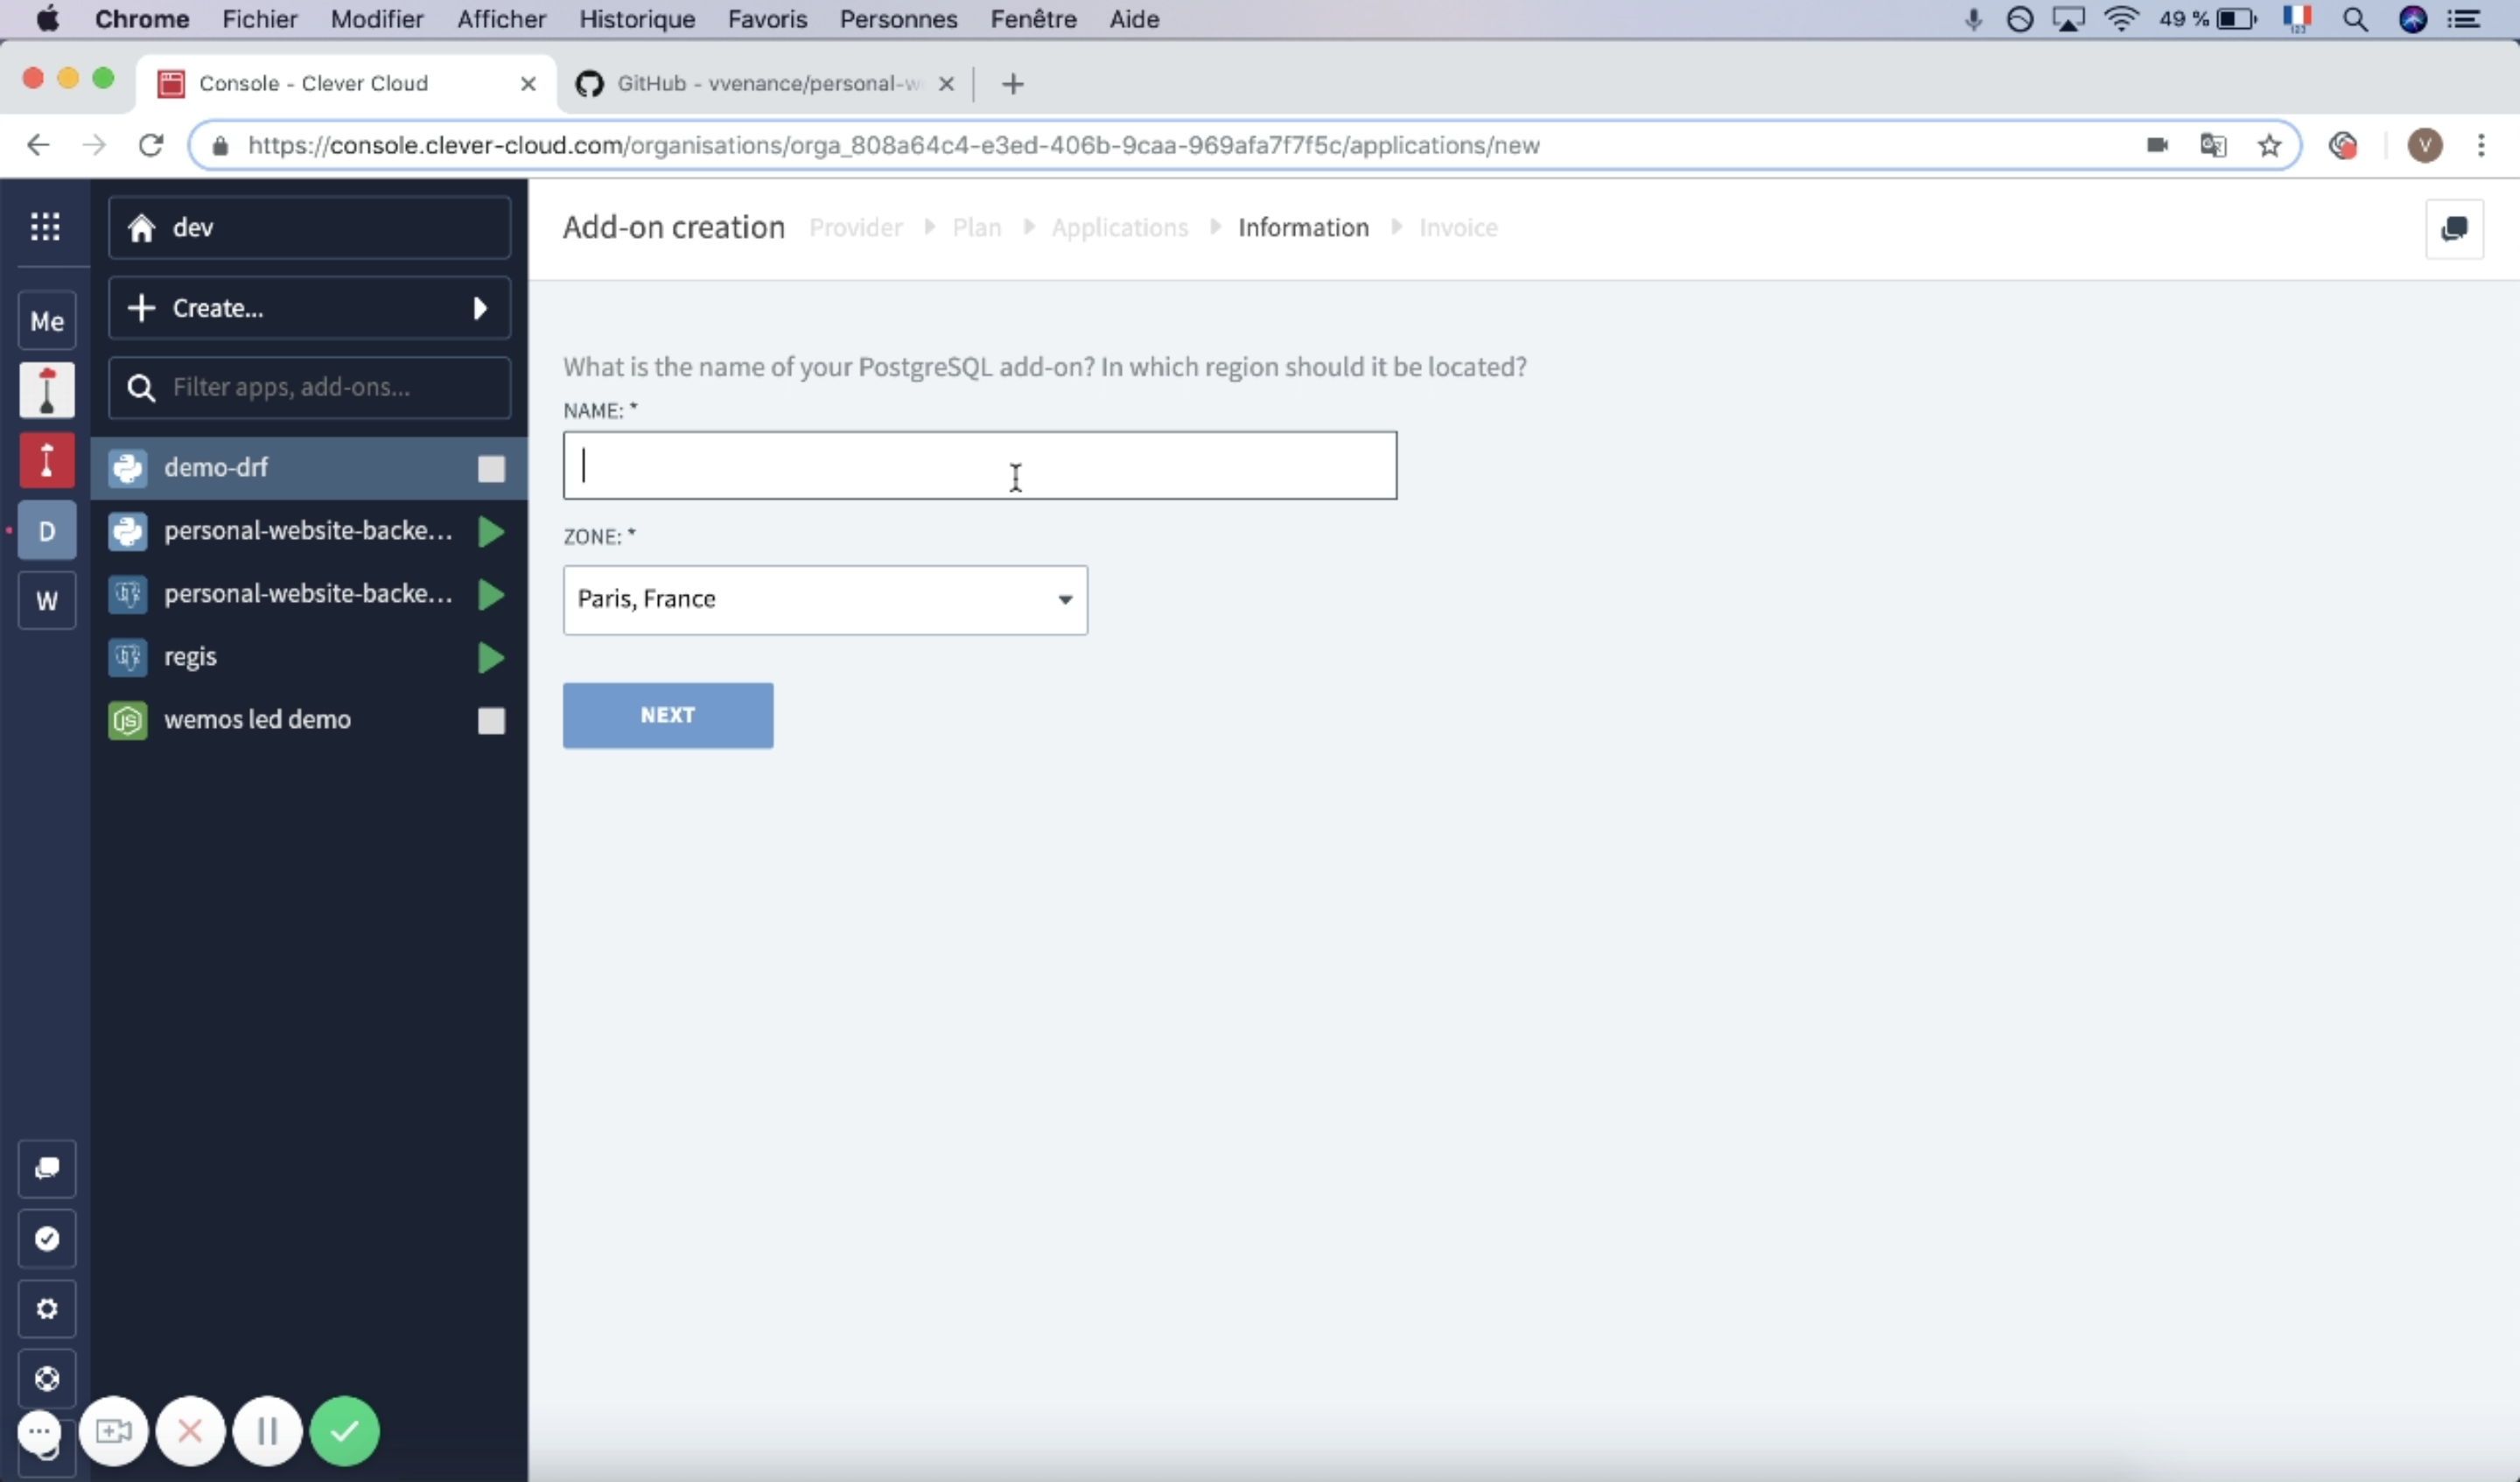
Just wait for the Clever console to set up your add on and application.
When your application is ready, you're invited to add environment variables.
If you use my project click on the expert mode button
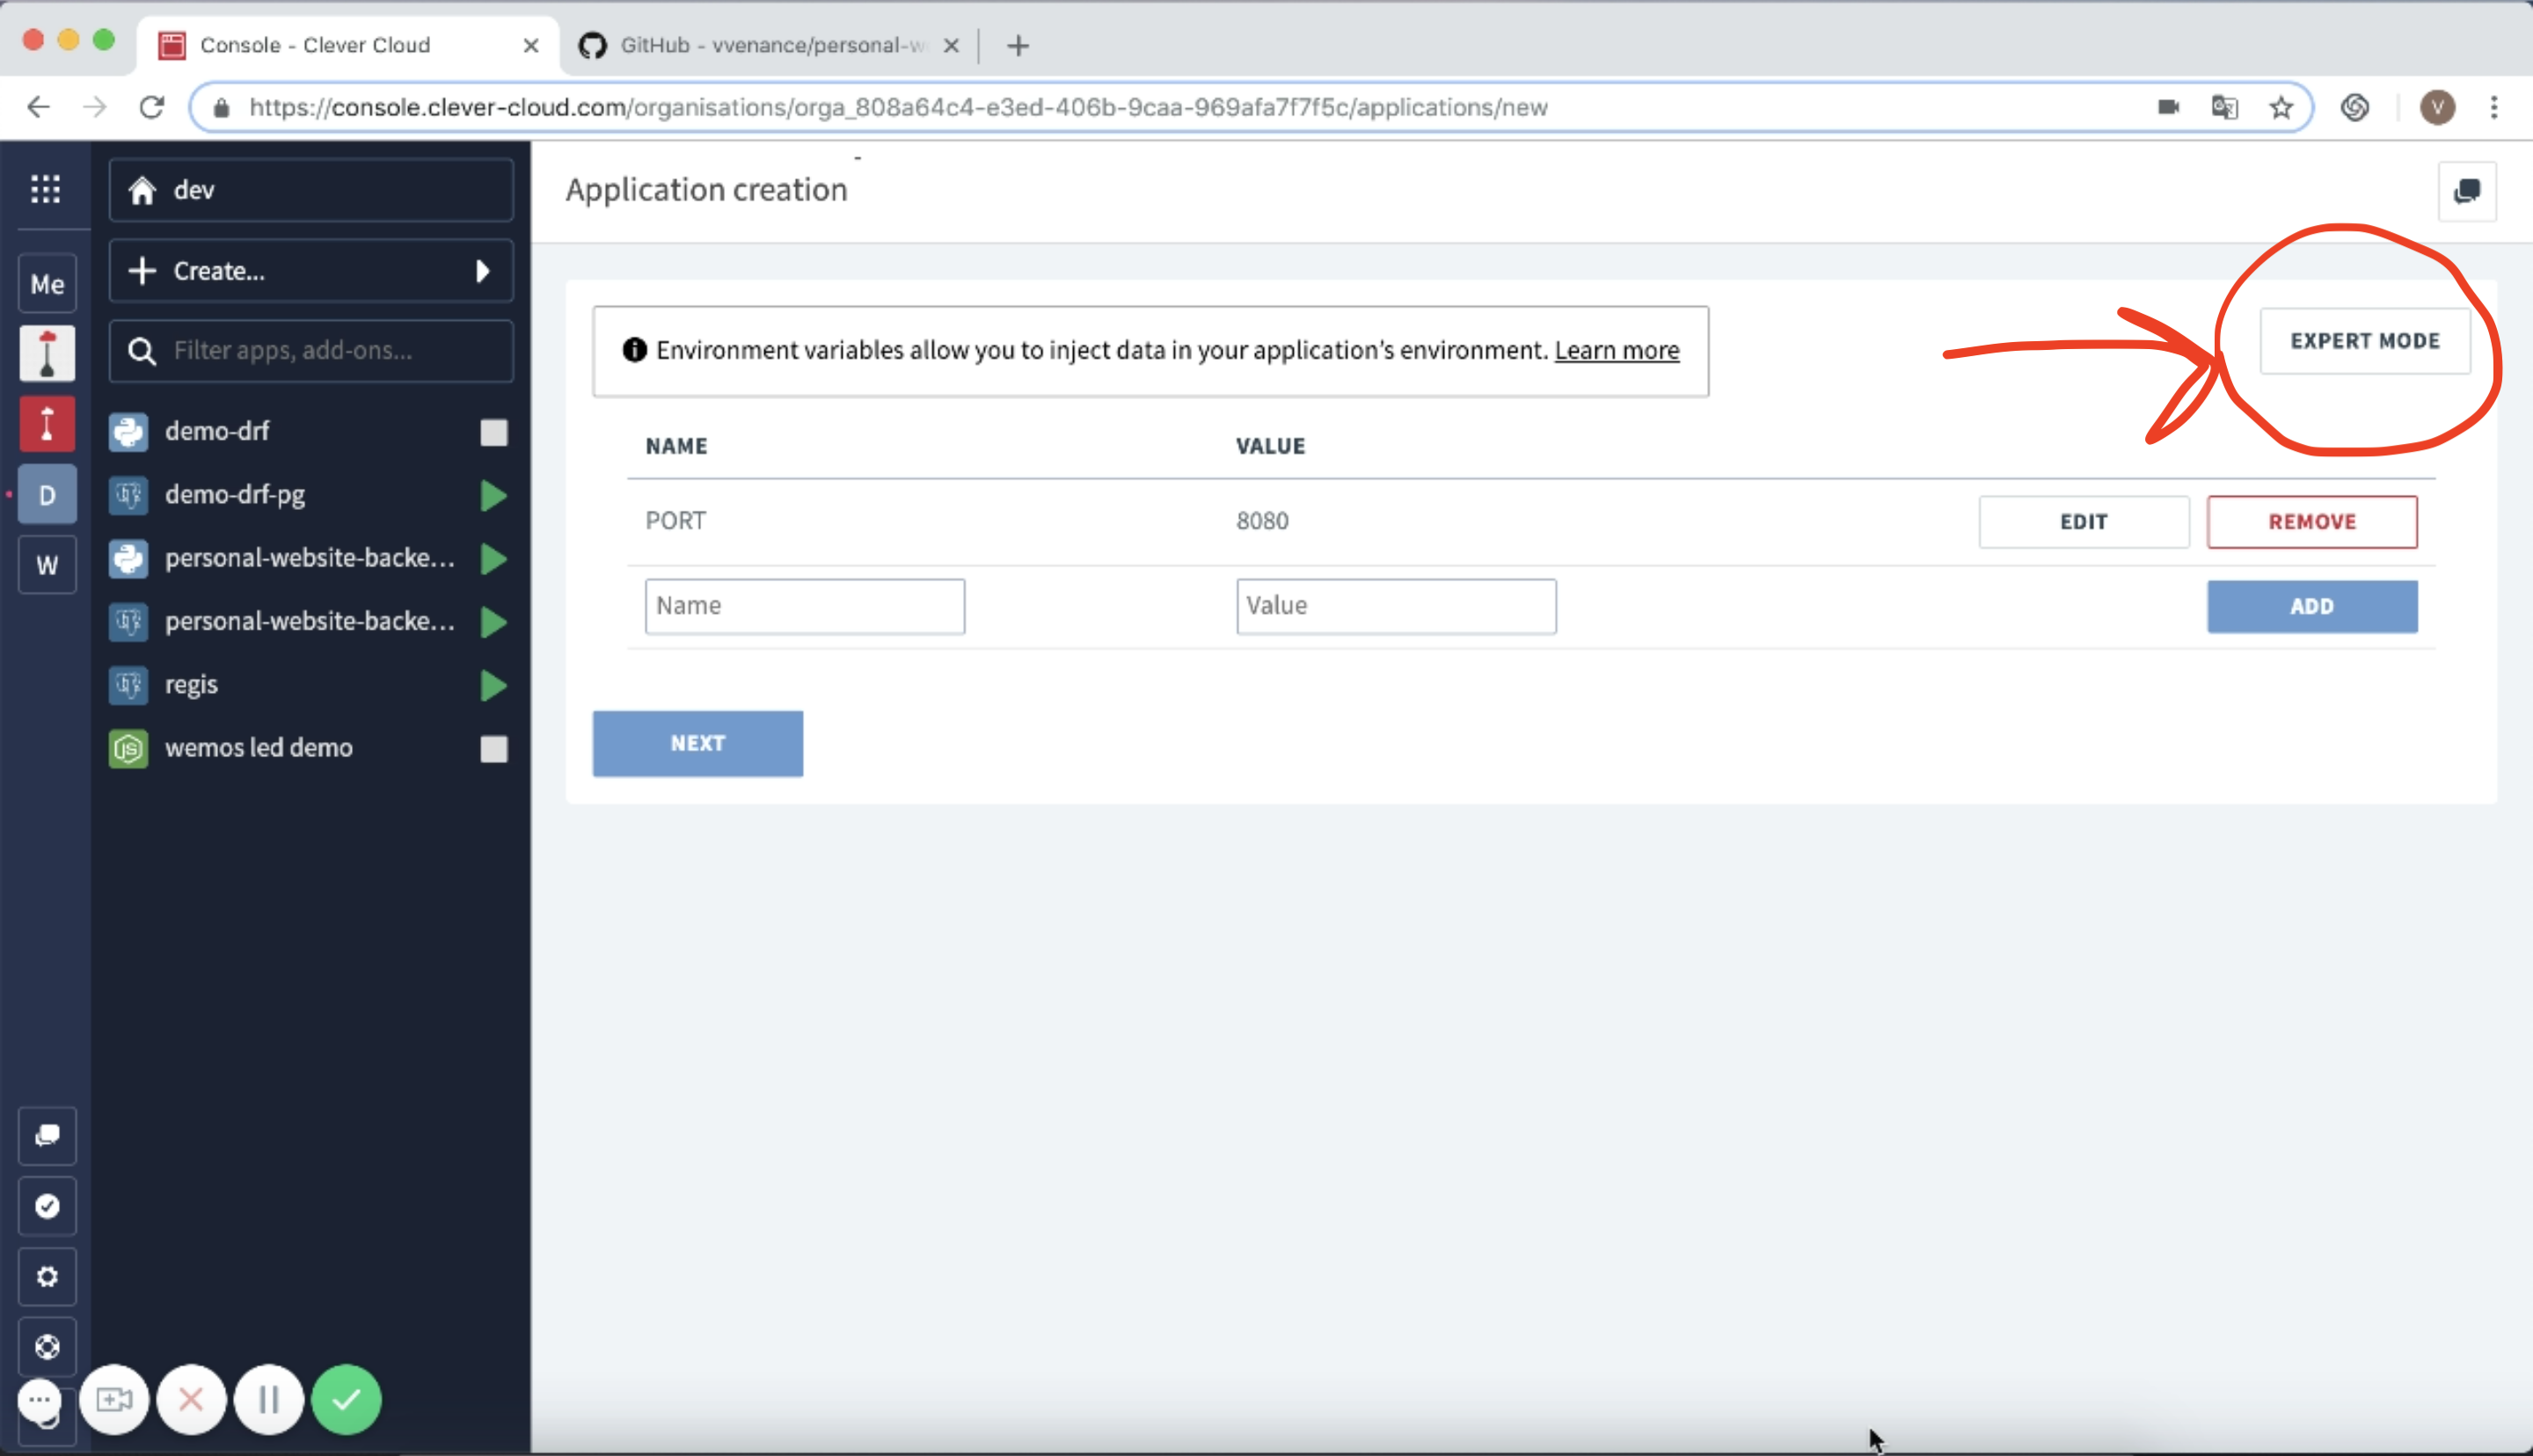
and paste the following :
CC_PYTHON_MODULE=personal_website_backend.wsgi:application
CUSTOM_SECRET_KEY=your_custom_secret_key
PORT=8080
PRODUCTION=True
You can generate a secret key 50 chars long (DRF requirement) here.
If you use your own repo, add the env vars you need, but make sure to have at least CC_PYTHON_MODULE=<your_module_name>.wsgi:application
Then click next, a new screen will display with a git command to add a new remote to your repo and do your first deploy
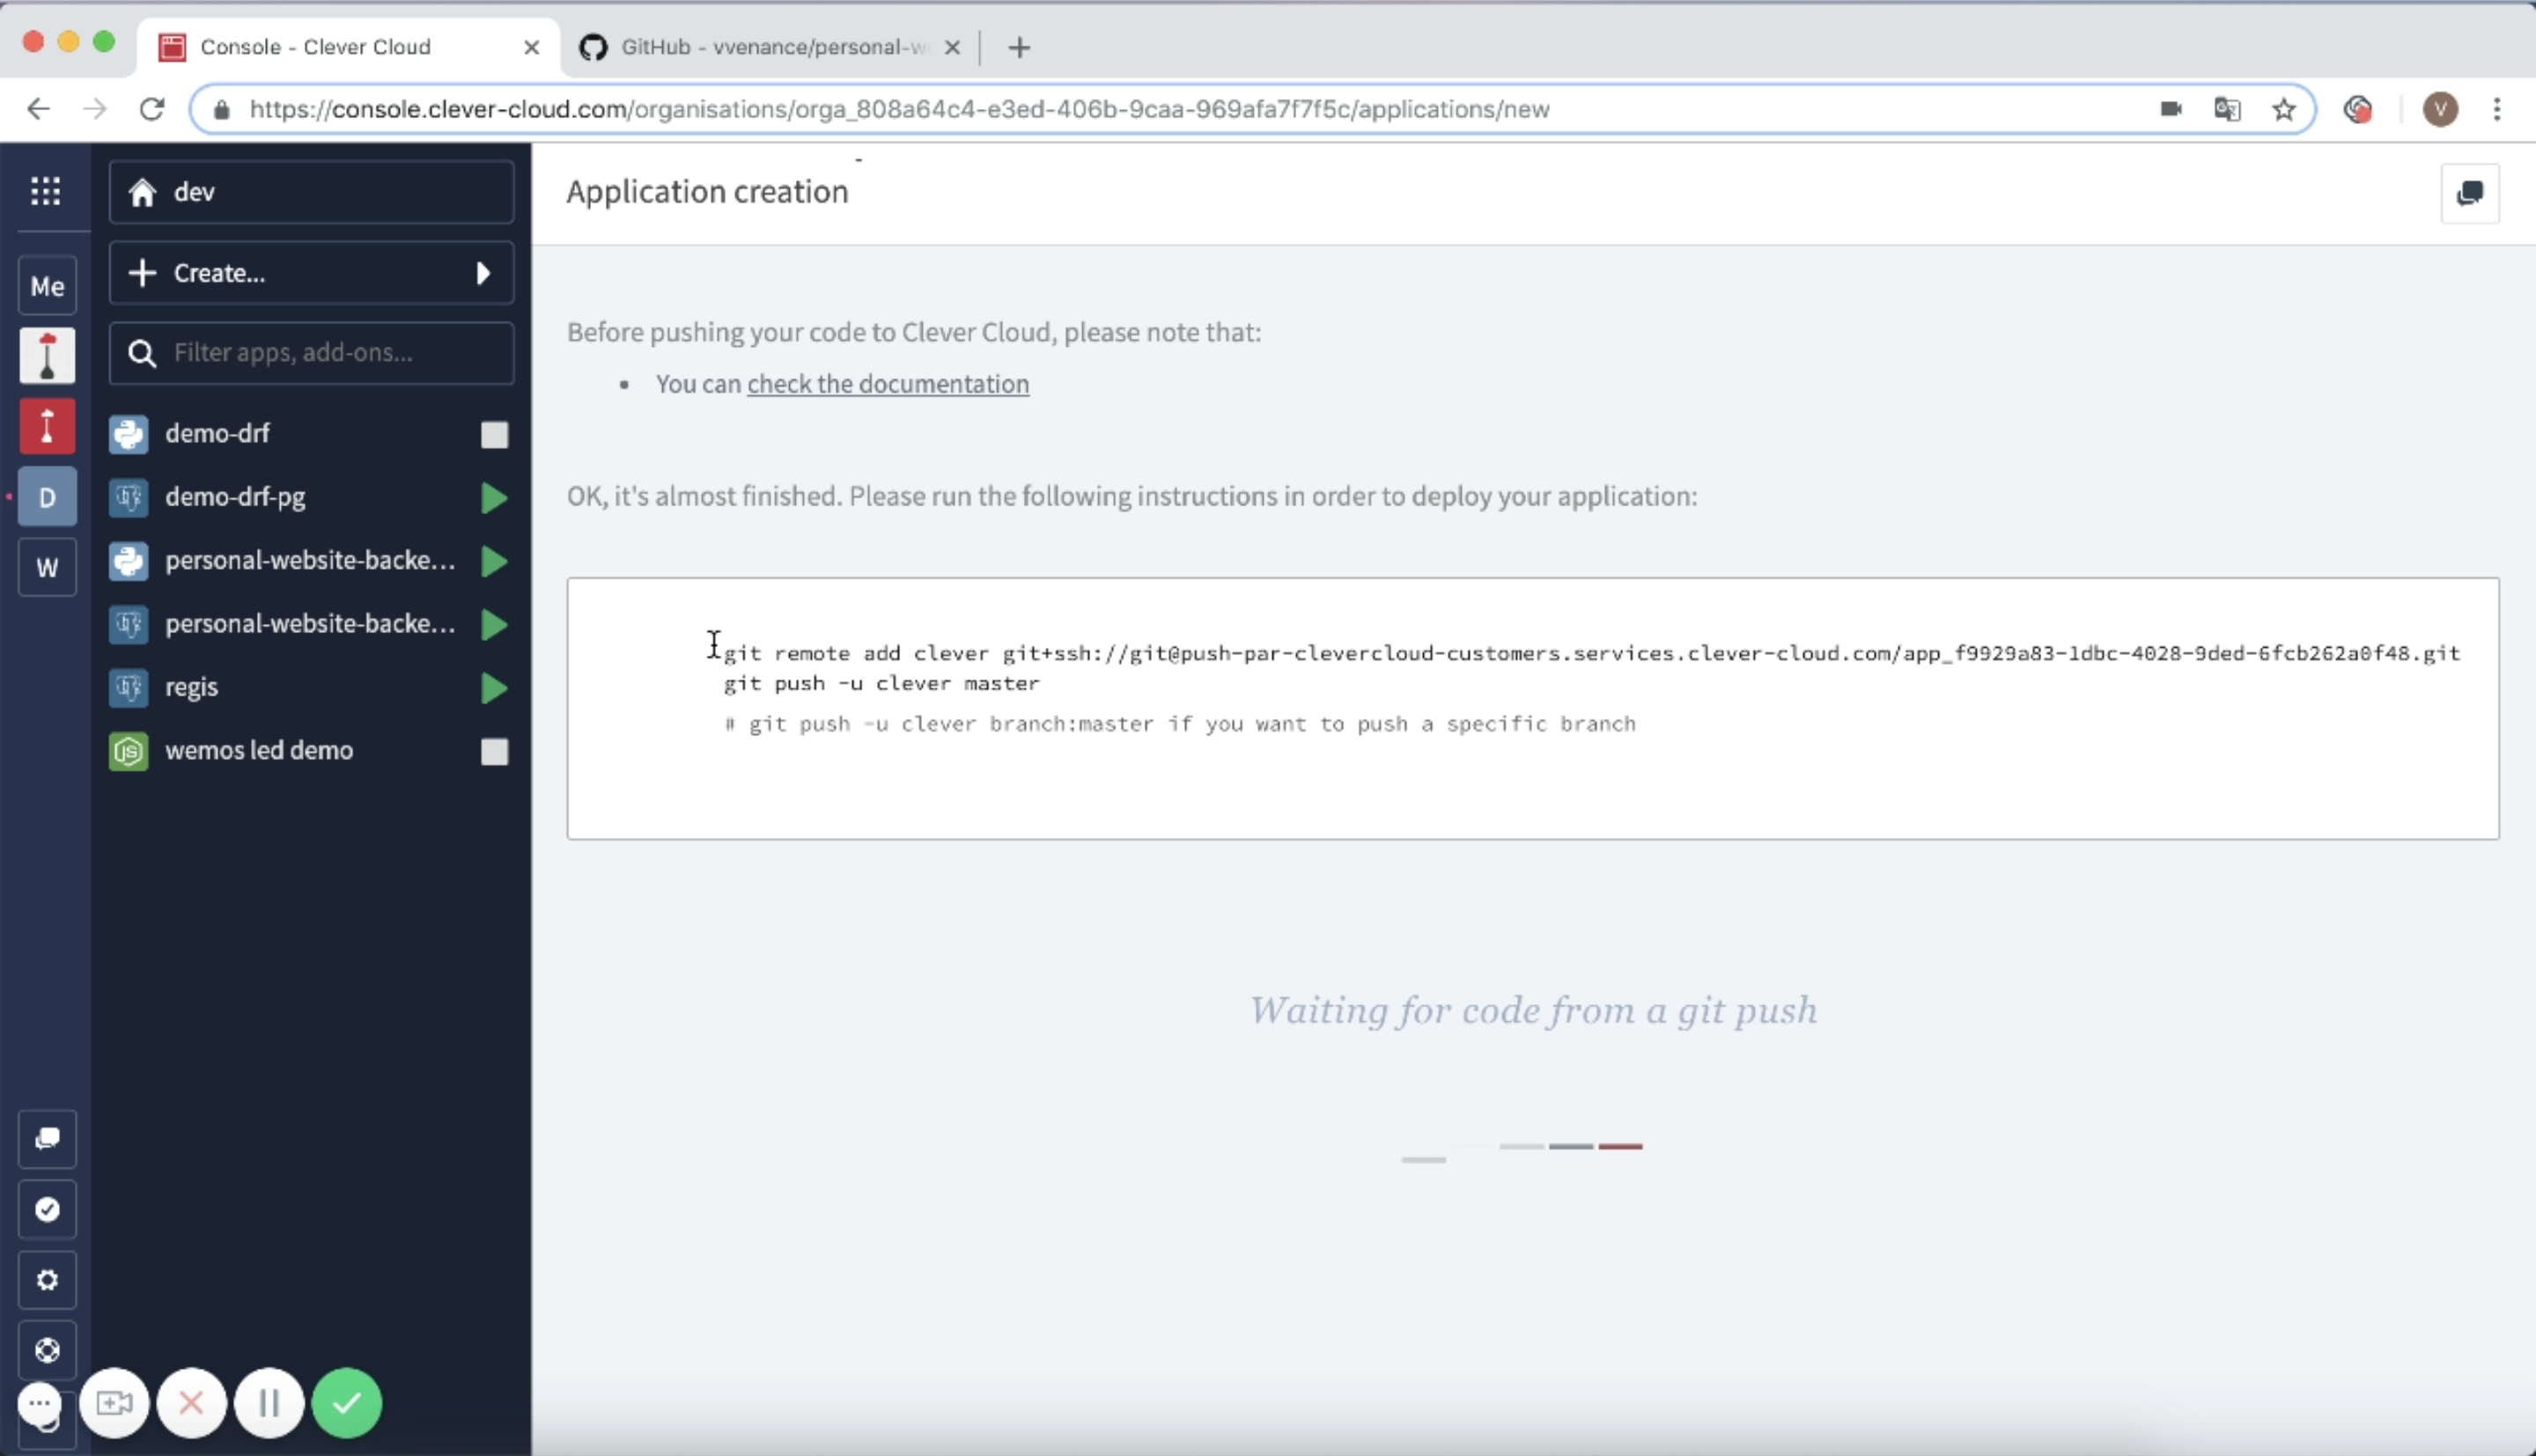
Copy these lines and paste them directly in your console while being in your repo
git remote add clever git+ssh:\/\/git@push-par-clevercloud-customers.services.clever-cloud.com/<your_app_id>.git
git push -u clever master
Go back to Clever Cloud console and just look at the deployment logs of your app. It will tell you when your app is up, so just go to the overview page and click on the link symbol to visit your app.
If you want to see the full procedure live, have a look here.